

Sewing Pajama Pants and Pattern Review of 5 out of 4 Pattern Company
I haven't made pajama pants in a couple years, but its my husband's bday week this week, and he requested another pair. I had made him several pairs over the years, but I never really liked how huge the leg style was and they never fit well around the crotch area - it was overall just too relaxed of a style. So I searched for a new pattern - however this was a challenge as both me and my husband are not small people. I'm aware of "grading" patterns, but I really have no idea how to alter a pattern other than length.
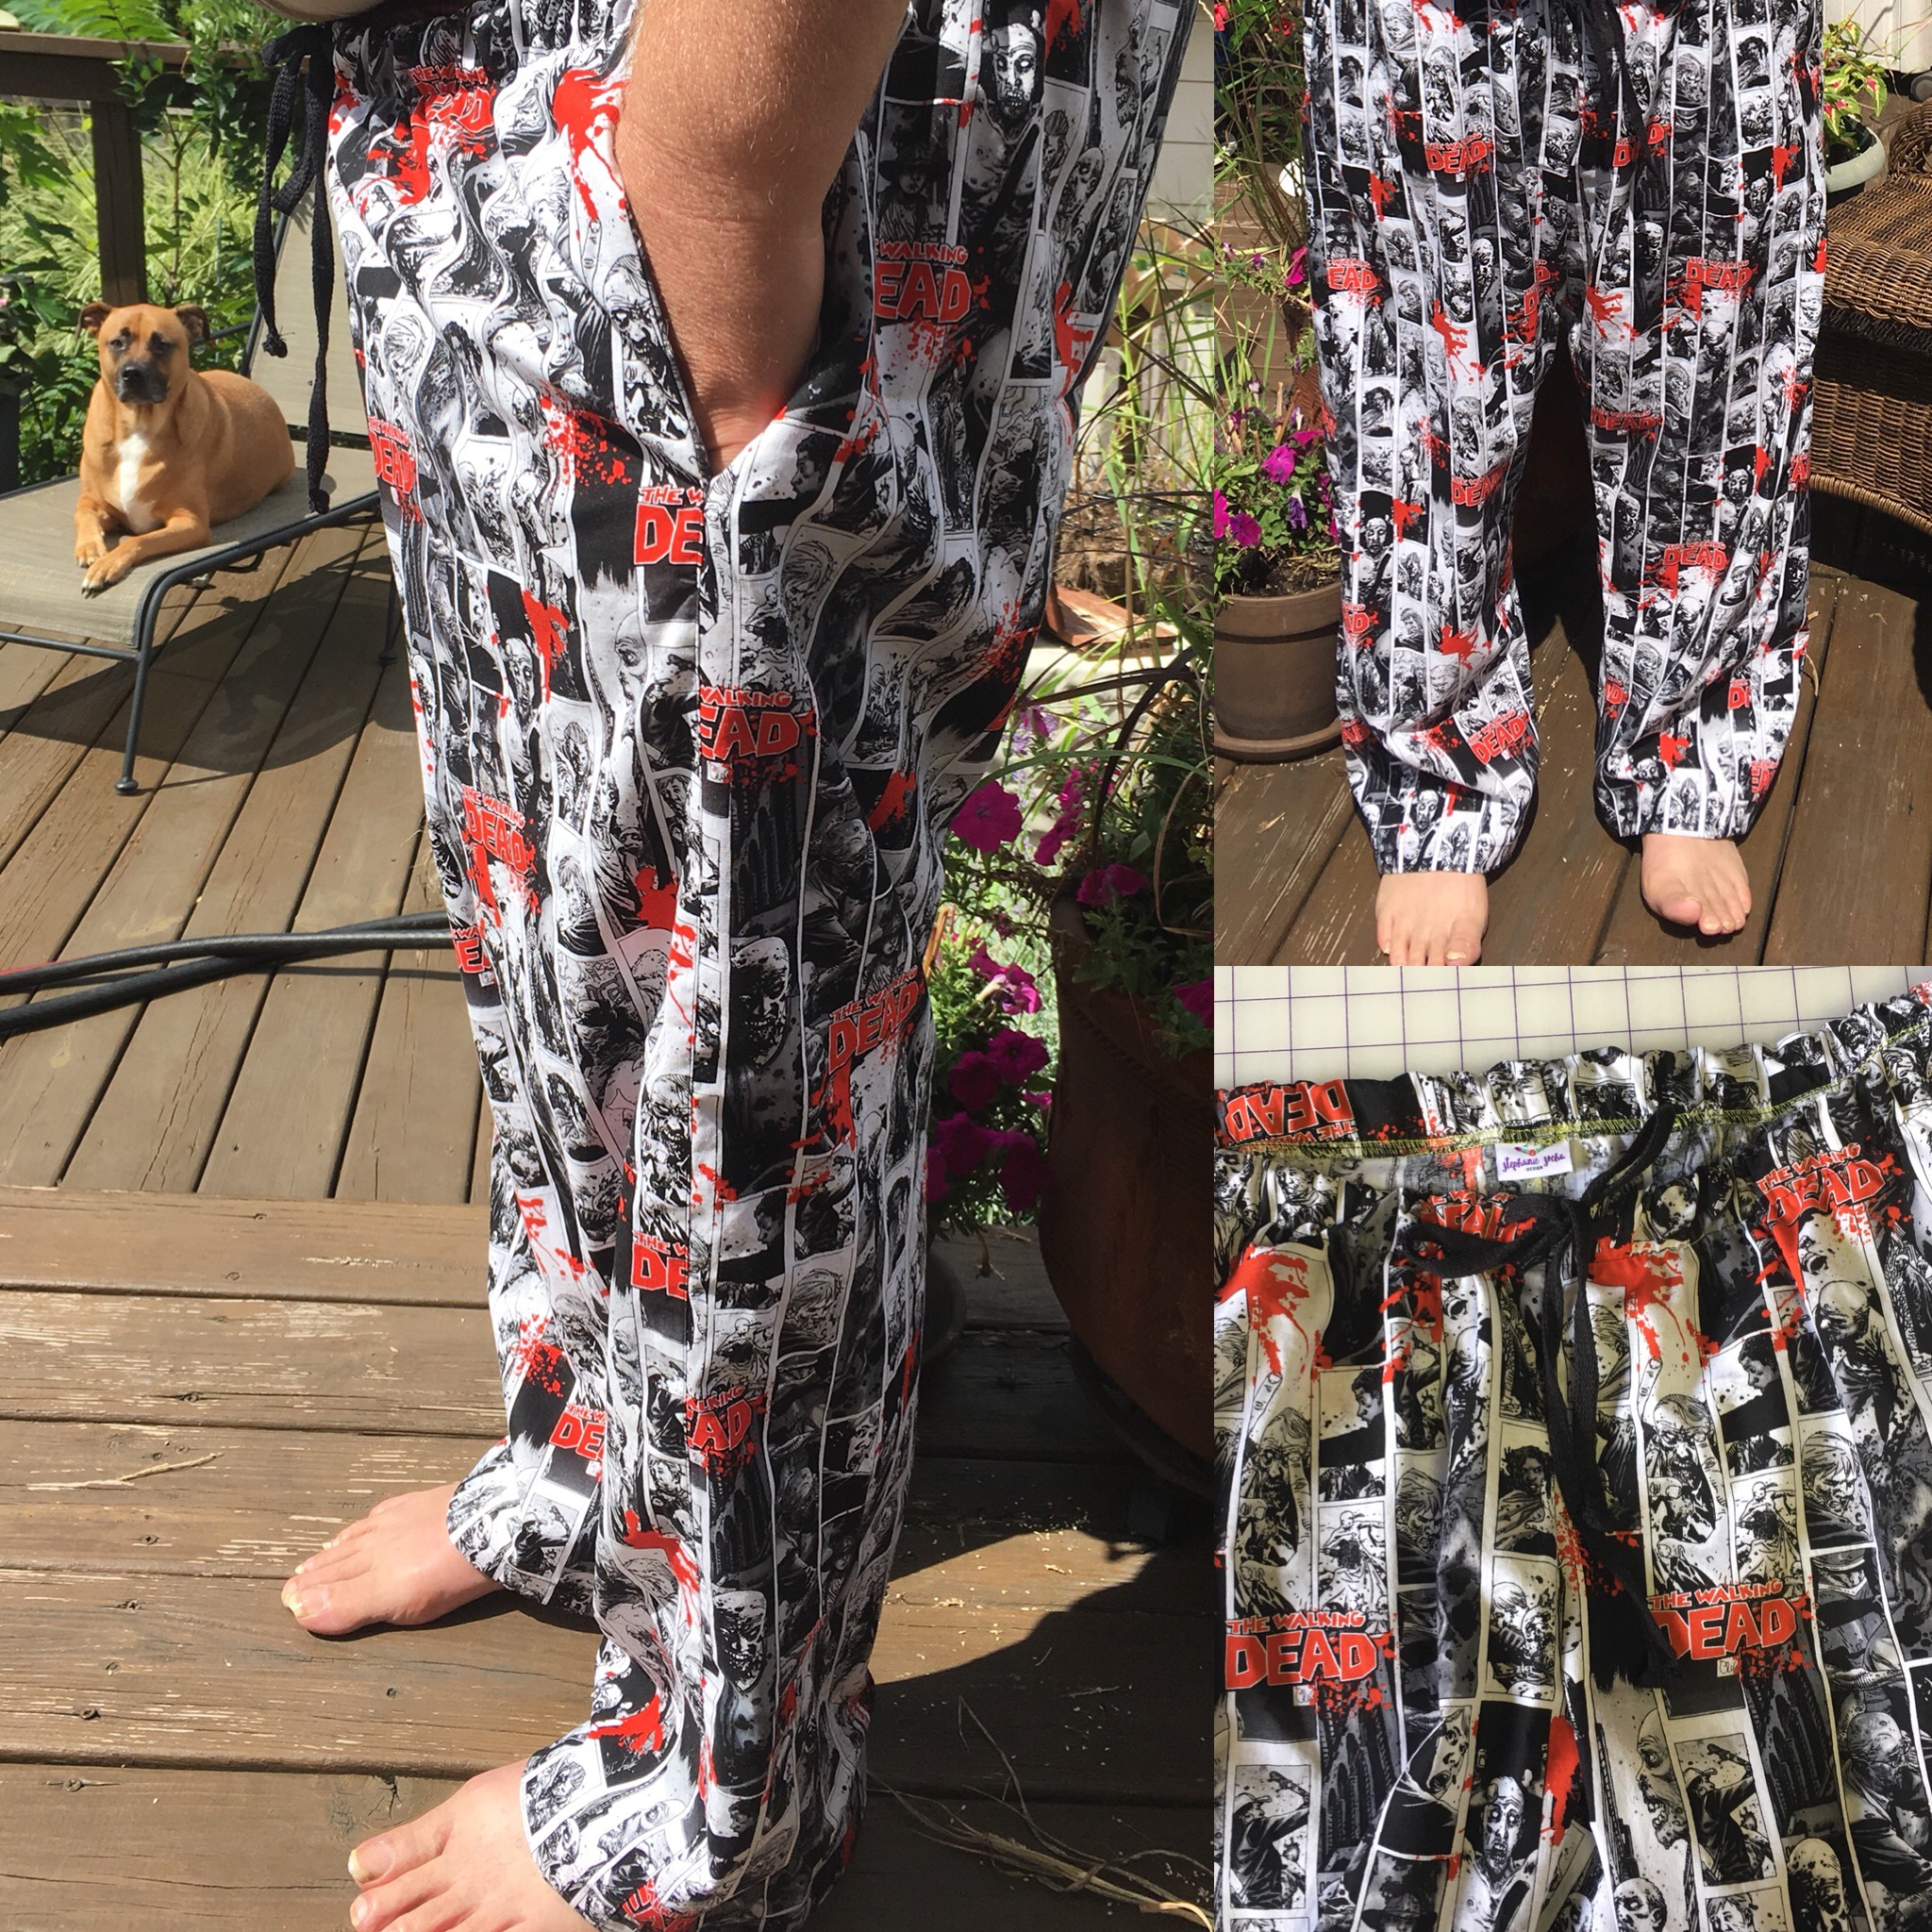
Finally, I found a pattern with a nice straight leg style and an option for a low-rise waist. Also these pjs have side seam pockets. I put the pattern in the cart and guess what...it was FREE! Here is the website I found it on ... 5 out of 4 Patterns . I scrolled through the other patterns on the site, and they have a nice selection of patterns for men, which is hard to find. So, I thought, let's see how these patterns work...I downloaded the pdf pattern, printed and taped it all together and cut out the pattern. It has a "no cut" design, where you overlay the pages on top of each other instead of cutting off a strip of one page to tape on the other - it was ok, but I wanted a diamond or triangle to help me line up the pages easier. I will say I love the "layers" in adobe for each of the sizes - that way I can turn off all the layers except for the size I want to cut, and I then don't have to try to decipher between several size lines on which line to cut on.
This pattern was super easy to sew, and the directions, which are called "Tutorial" were easy to follow, plus it had a nice flow of incorporating extra options like drawstring and sewn elastic waist or just a casing elastic waist, or adding ribbon detail to the lower leg part if you were making the pjs for a woman. There was also a cut line added if you wanted crop length pj pants.
I really liked that the pattern designer included reference to different construction type options. For example, serger construction was referenced wherever it was appropriate to use a serger. It did suggest a serger could be used for entire construction, but on a woven fabric, I would not do it entirely on the serger.
Here is how I constructed the pjs with a few tips on serger finishing and hem prep and finishing:
“To avoid shrinkage, I ALWAYS pre-wash cotton fabric prior to cutting out pattern pieces for making clothing. Serge or zig-zag the ends so the fabric will not ravel in the washing machine/dryer.”

sew then serge
Sew construction seams on sewing machine, then finish edges with 3 thread overlock stitch

baste
sew a baste stitch at hem folds and easily press the hems up without measuring
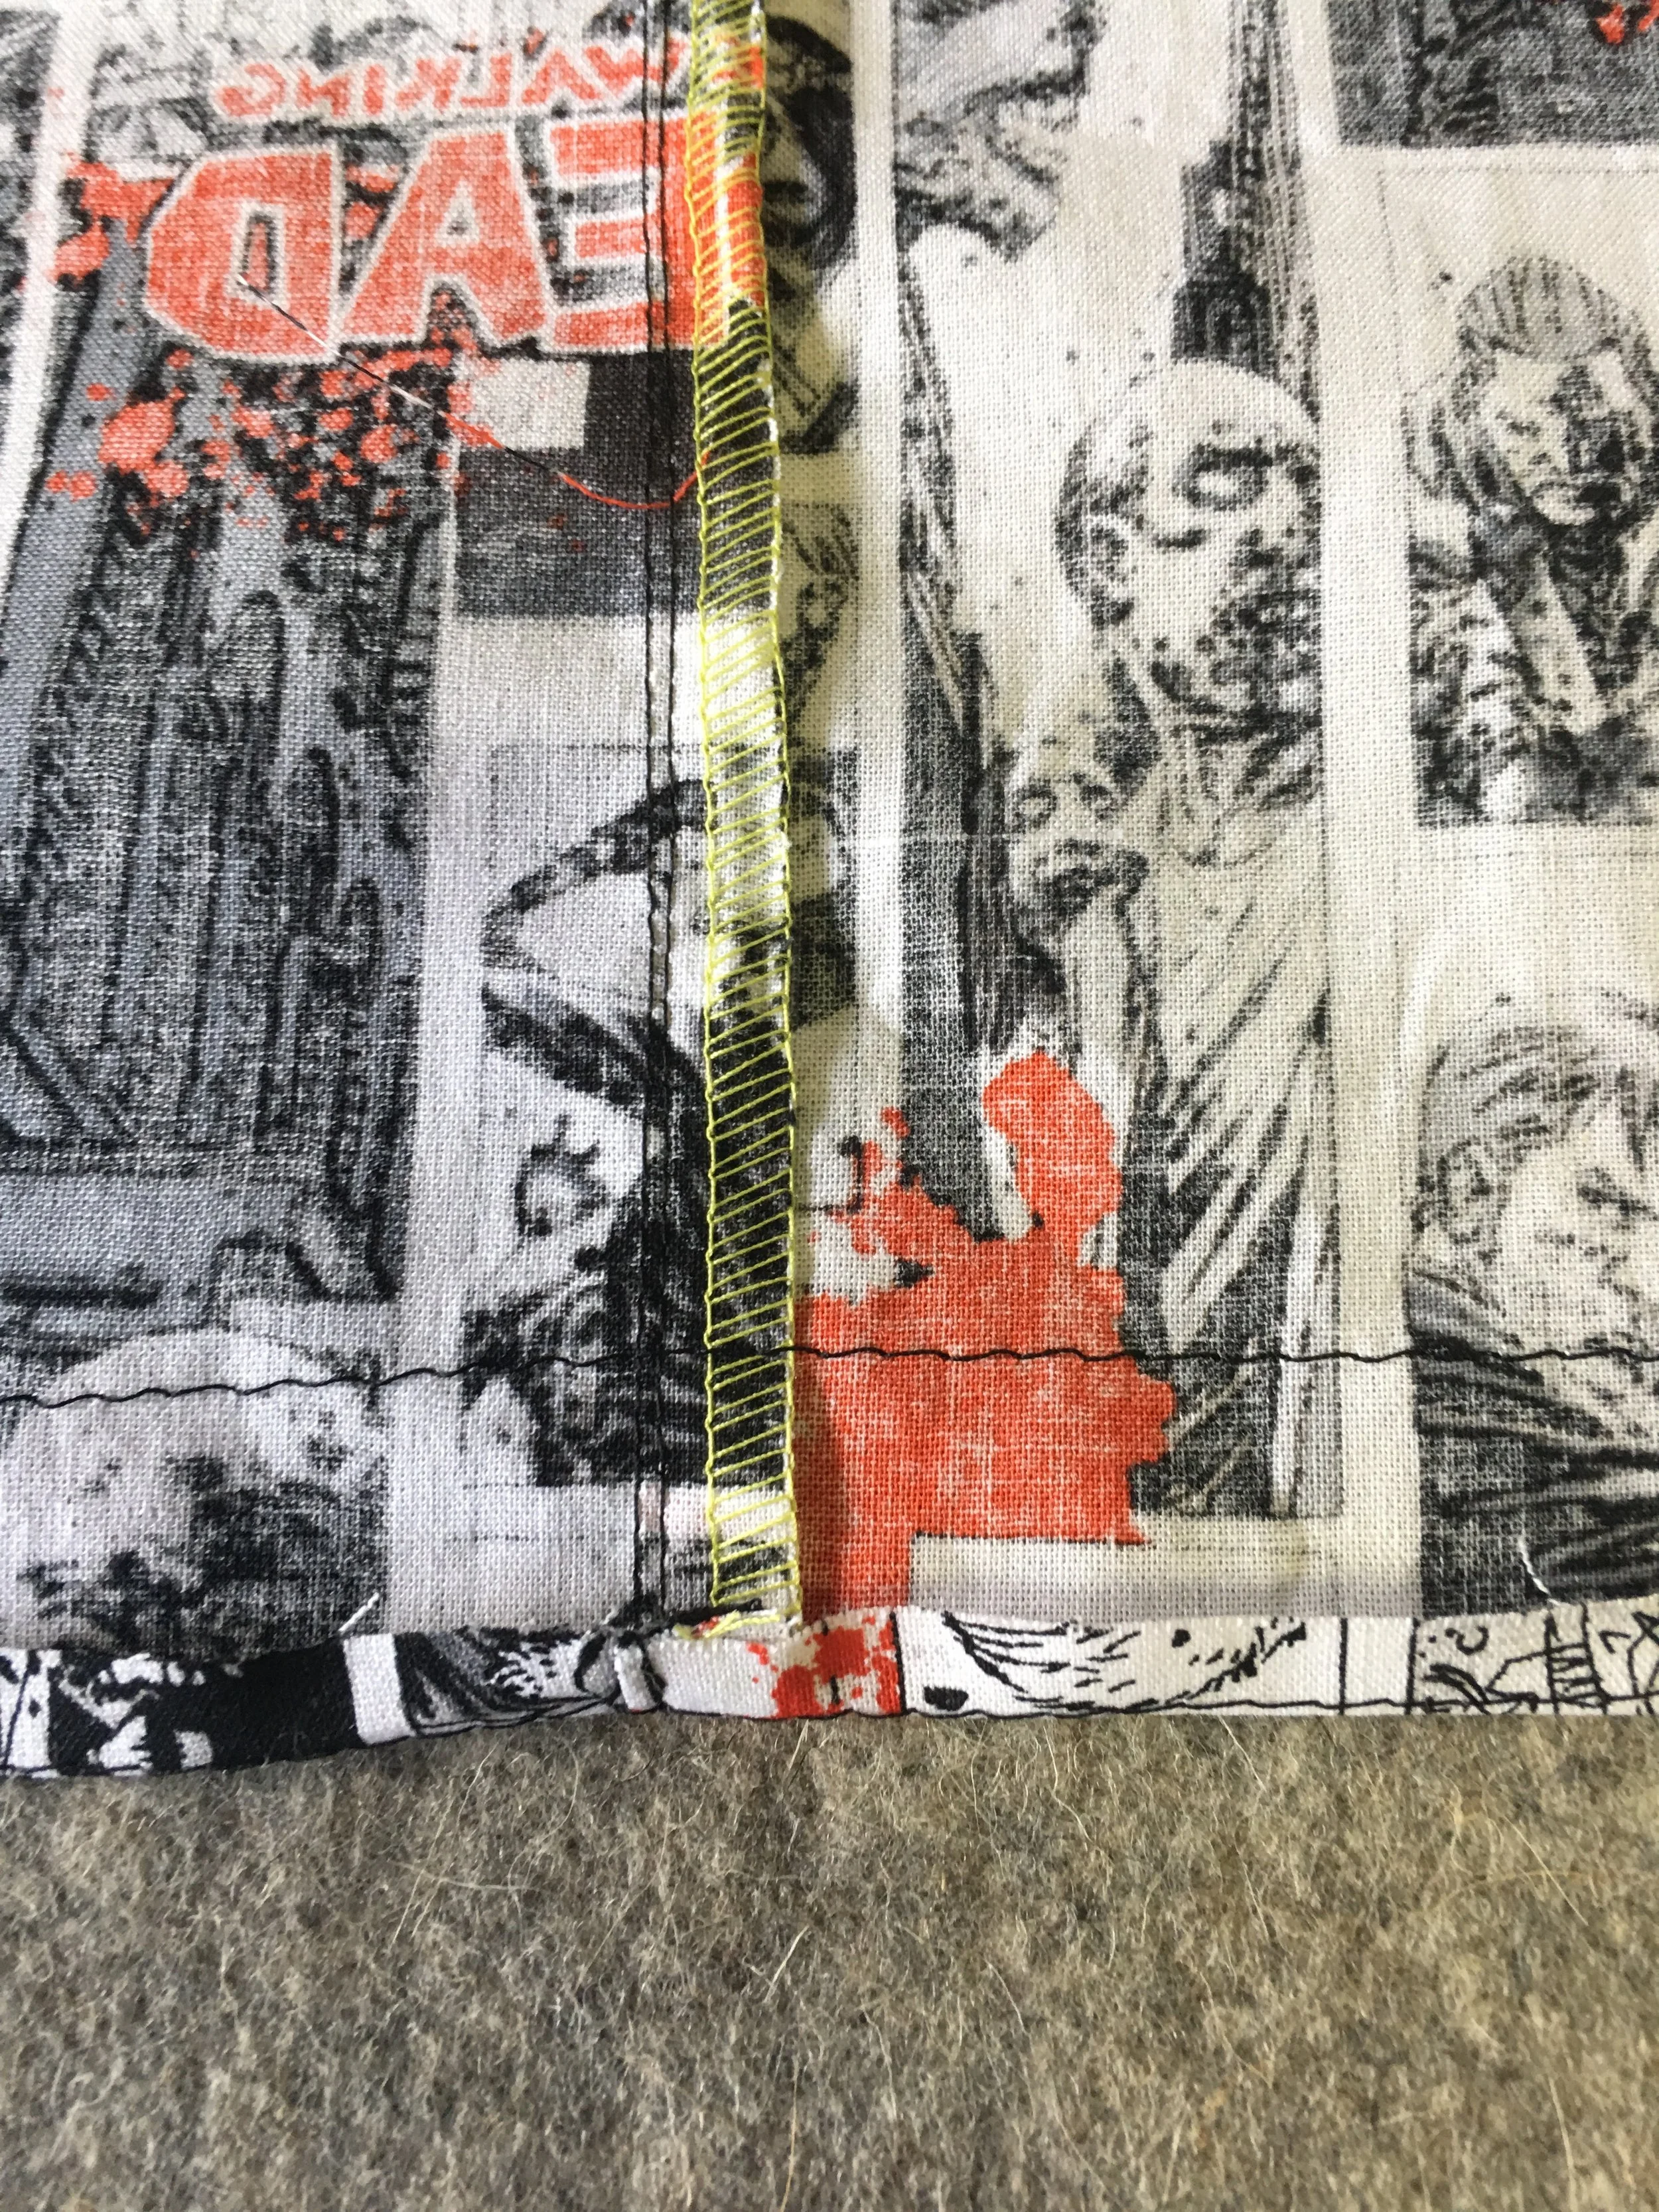
Press flat
Most pattern instructions leave this step until the end when the legs are in the round and hard to press up evenly. Press up the hem allowance while leg is still flat (before sewing inside leg seam)

double stitch
The instructions do suggest this, but definitely double stitch the crotch seam, or you will end up mending these in the near future!
Serger thread can be fun in a contrasting color - I had this cool lime green in the serger already and kept it in for fun.
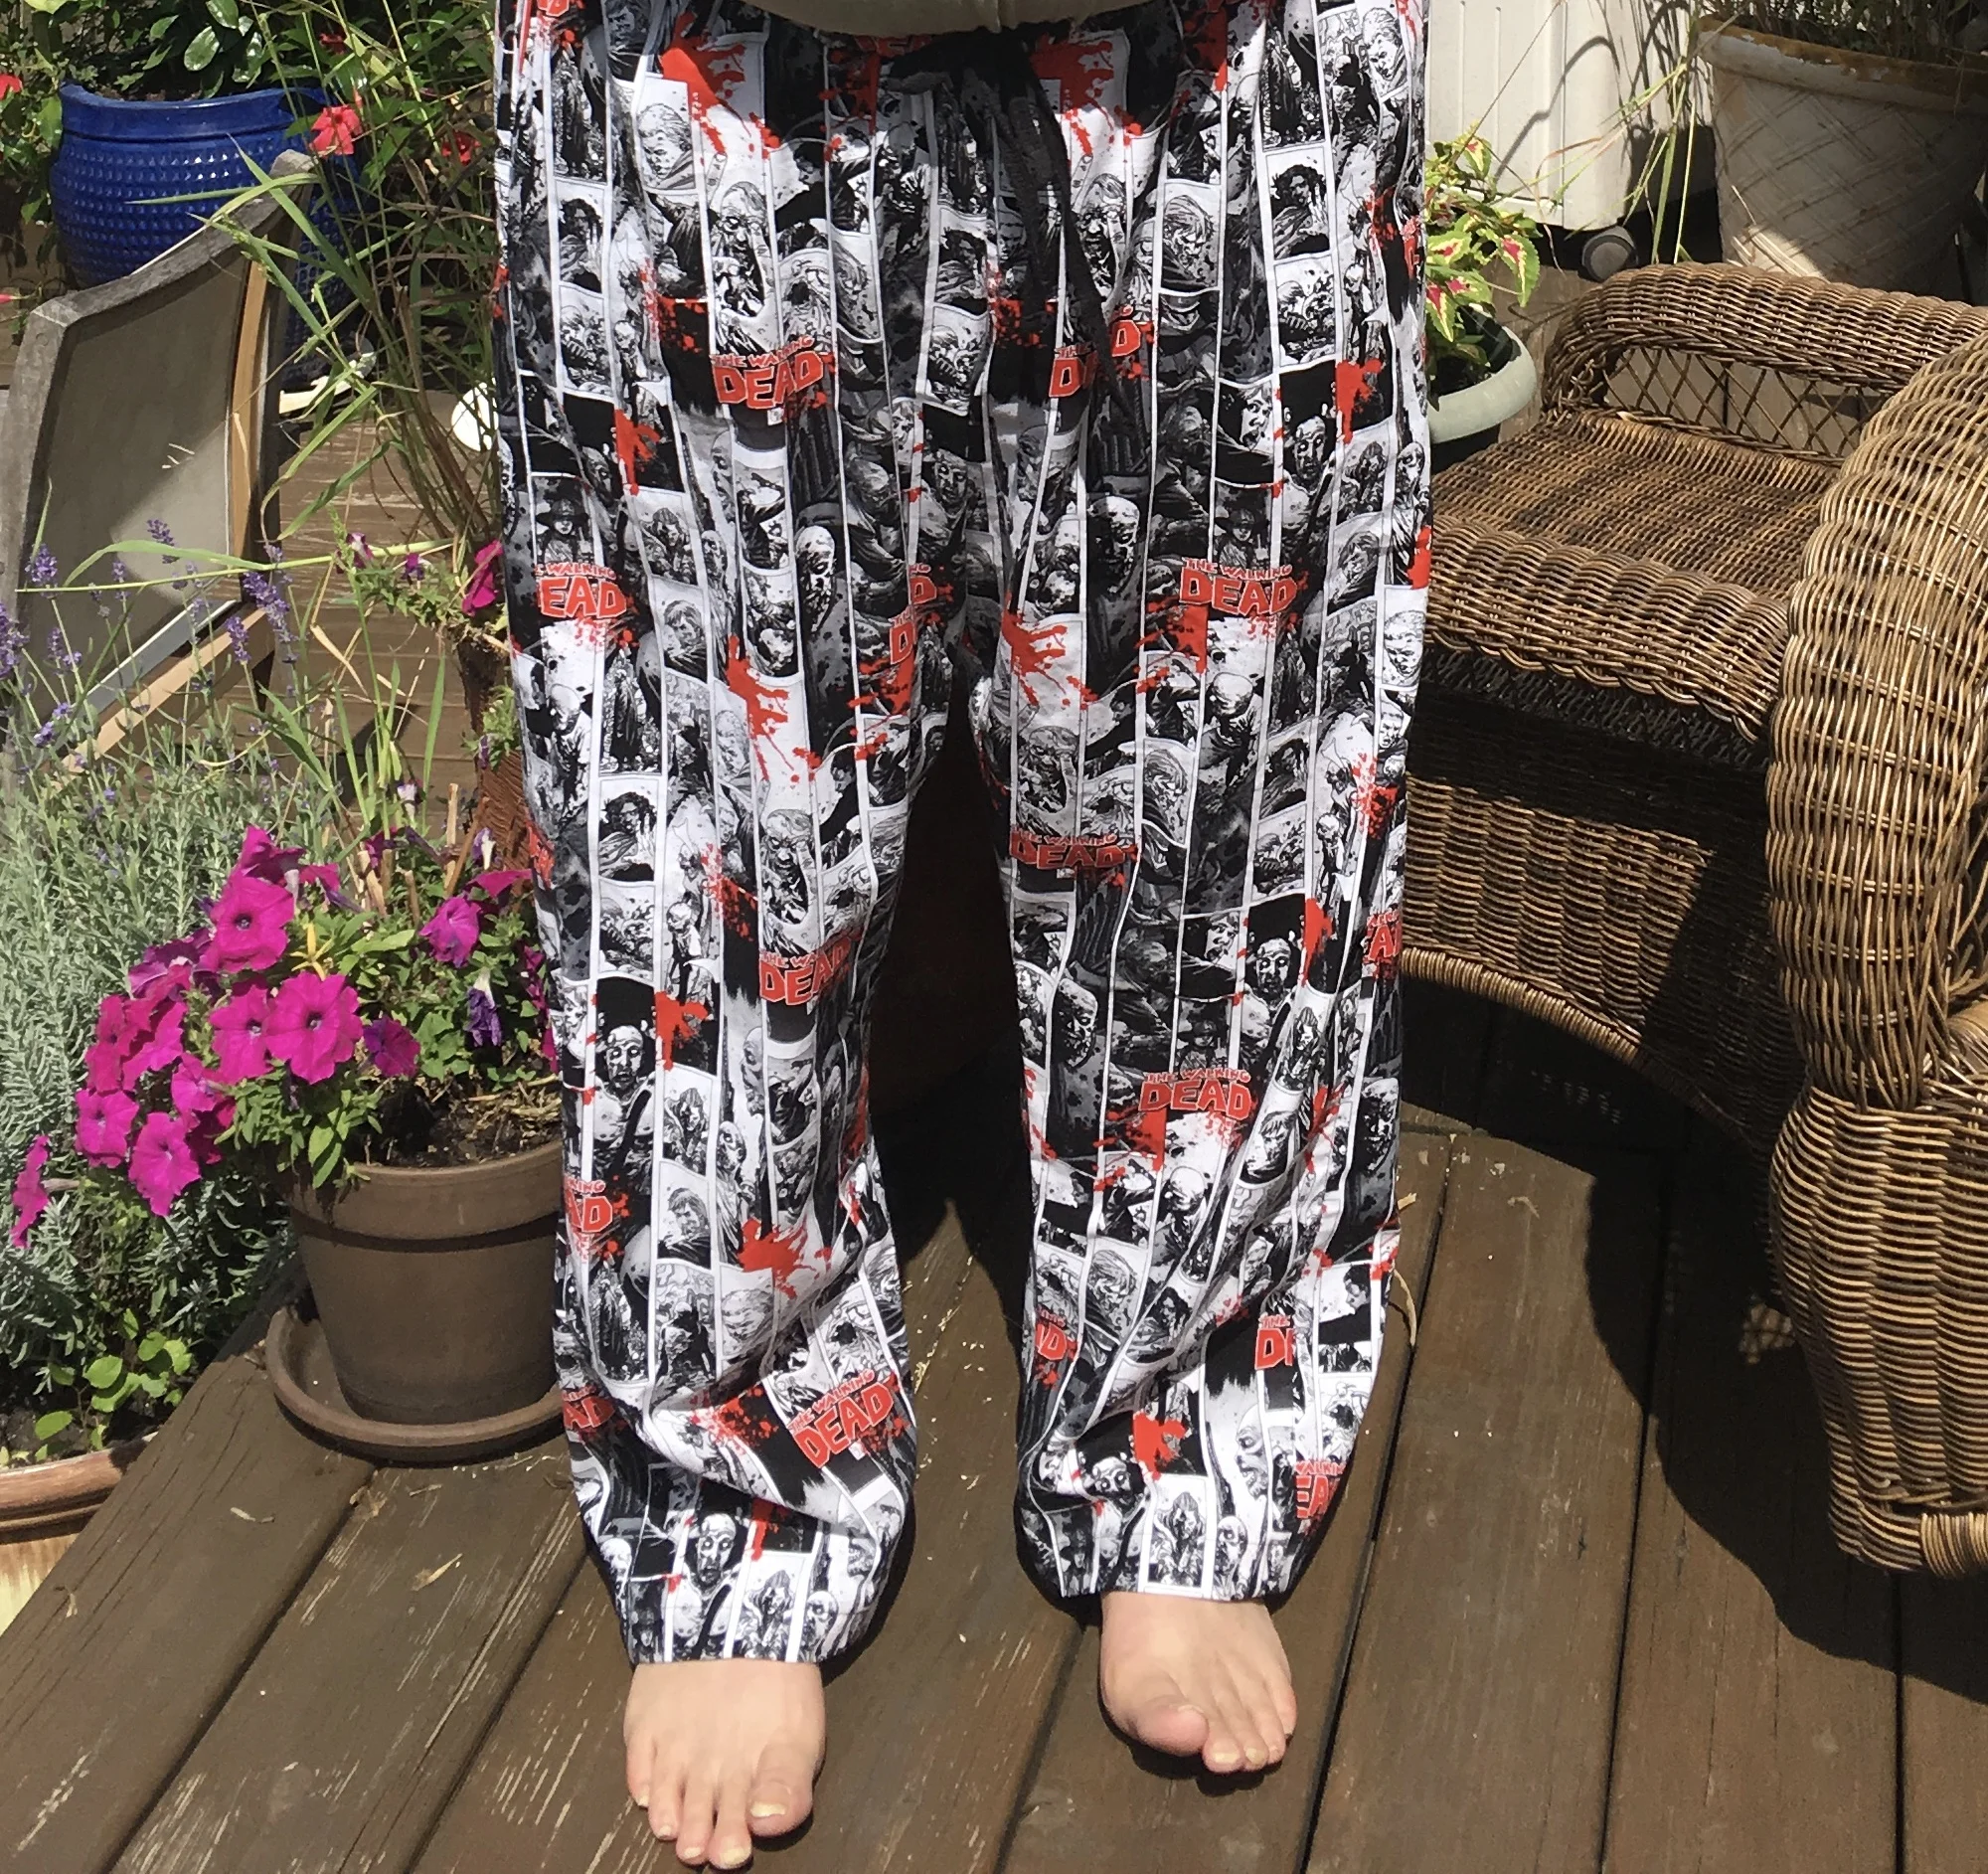
fit before final hem
I had my husband try on the pjs before I sewed the pressed up hem in, and I ended up folding it up again for the right length - measure twice stitch once :)
I did note on the pattern for the next time I make these for my husband, to shorten in the leg 1" so that I don't have that extra fabric in the hem next time.
That's it! I definitely recommend this pattern, and I am going to check out more patterns from 5 out of 4 Pattern Company.
Let me know if you end up trying this pattern out, and what options you decided to incorporate.